How to install/remove:
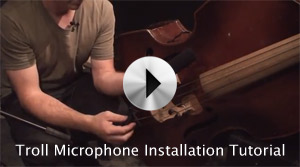
Installation of the Troll is very easy. First, support the bass so that the bridge is accessible. It can be leaning back on a couch or soft chair, sideways on a small speaker cabinet or amp, or on it’s side on the floor. Place two elastics on the microphone, near the cable, and outside the external windscreen. Tie a single loose overhand knot in the cable, or quadruple wrap an elastic around the cable and pull a loop out to take up the slack. Suspend the XLR jack temporarily by dropping it between the string afterlengths from the inside. Holding the mic inside the arch of the bridge legs, pull one of the elastics around the bridge leg from the bottom, and loop it over the top of the microphone. Repeat with the other elastic and bridge leg. Loop the zip tie through one of the tailpiece string holes from behind, so that the buckle and tail end up behind the tailpiece. Close the zip tie onto the XLR connector, and snug it up, so that the latch opening on the connector is facing out. This makes disconnecting the cable much easier. Trim the excess tail, making sure to leave enough tail to reuse the zip tie! Check that the mic is oriented correctly by observing the location of the visible screw hole at the cable, it should point more or less directly away from the top of the bass. Use the overhand knot and/or the elastics to fine tune the mic position (this is mostly aesthetic).
Removal from the bass is the same process in reverse, with one important note. It is much easier to loosen the zip tie if you push the XLR connector out first. This takes the tension off the loop, and allows easy removal and reuse of the zip tie without tools.
How to use the Troll for live performance:
First, it is important to understand that the differential between the bass’ acoustic volume and the volume on stage is the primary factor in determining how usable any microphone will be in a performance setting. For example, consider a traditional acoustic bluegrass group, and a bass that produces a big full sound and supports the band with no amplification. If this same group uses microphones instead of pickups, and keeps the monitor volume low onstage, using a microphone will be easy. The acoustic volume of the bass, especially very close to the bass, is quite loud compared to the other instruments on stage, and the monitor volume. For comparison, consider a psychobilly band with a former hair band double bass with taps drummer and two telecasters running fender twins up into their saturation range. Except for recording in isolation, no microphone in the world will work for this band’s upright bassist. The acoustic volume of the bass will be essentially inaudible compared to the stage volume, so the microphone will be mostly capturing the sound of drums and guitar amps. Of course, most upright bass players play in a wide variety of situations, and most of them are somewhere between these extremes.
A ribbon microphone is an unmodified pressure gradient microphone, and as such, exhibits a figure eight polar pattern. This pattern has a very large “null zone” in the shape of a donut, which is a big asset when using the microphone in a situation where feedback and bleed from other instruments is a possibility. Imagine two spheres, meeting at the microphone. These represent the “hot zone”. Now imagine a big fat “donut of rejection” with the bass bridge stuck through the donut hole. It’s fairly easy to orient the bass on stage such that this null zone covers most of the other instruments on stage, and the source of amplified bass sound. A Troll users “null donut” is their most powerful tool for combating spill and feedback.
Being a microphone, and not a pickup, the Troll works best with PA equipment rather than bass amplifiers. Bass amps are almost invariably designed to be used with electric bass guitars, and do not usually reproduce the sound of acoustic instruments in a pleasing manner. Moreover, bass amps do not usually have the proper connection or preamp to interface with a microphone. Ribbon microphones have a very low output, and therefore require a preamp that provides a lot of gain without noise. The Troll is hotter than many vintage ribbon mics, and the close in mic placement yields a lot of signal, but a high gain preamp, or an inline preamp like the FEThead, is still required. Acoustic Image products are an excellent choice. QSC powered speakers are also highly recommended. A few commonly used scenarios are as follows: 1) Troll > small self contained PA system, such as the Acoustic Image combo amp. 2) Troll > appropriate preamp or small mixer > powered speaker, such as QSC K series. 3) Parallel your favorite pickup > your favorite amp onstage / Troll > FEThead > front of house PA system. These are just examples. As with any serious audio tool, the options are open, it can be used in any appropriate configuration that proves useful.
A few things to avoid: 1) Excessive stage volume. 2) Large amounts of liquid. 3) Wedge monitors. Side fill or rear placement of monitor speakers are much better for avoiding feedback. If downstage wedges are unavoidable, use the null donut on them. 4) Compressed air. (this will damage the ribbon, even through the windscreens!) 5) A rigorous DIY drop test regimen. These are more durable than most ribbon mics. They are still ribbon mics….. 6) Ghallager (see #s 1 and 2). 7) Phantom power. Don’t connect ribbon mics to phantom power. More detail below.
How to record with the Troll:
This is probably the best thing about the Troll. This is also the origin of the project. The Troll is a result of the quest to find a way to effectively record the upright bass in the same room with a drummer. Bass and drums work together. Together they are the heart of the rhythm section. The way great rhythm sections work together is very hard to quantify. It’s all about feel. When you stick the bass player in a closet and the drummer in another room, the feel gets disconnected. It’s not about being able to see and hear each other. It’s about begin able to FEEL each other. Now, with a reasonable amount of attention (gobos, room arrangement etc.) drums and bass can keep the feel, and still print tracks with usable levels of spill. Now a bassist can record with a sound that they are accustomed to hearing live, and not be recording a piezo. Now a bassist can move with the music the way they are used to doing, and not compromise mic placement. Now live multitrack recording can yield tracks that are one step closer to a finished product. What a relief!
All the same stuff from the live use section applies, the null donut and high gain preamps and dodge the phantom power and all that.
How does it work?
The entire story is a little too involved to discuss here, but I’ll give a brief explanation. Any dynamic microphone (a ribbon is a type of dynamic mic) uses the same principal. A conductive element which completes a circuit (in this case a ribbon) is suspended in close proximity to a magnet. When the element is made to vibrate, the magnetic flux induces an alternating current in the circuit. This alternating current is a very close analog of the sound wave at the point of capture!
How does the Troll interact with the bass?
A large majority of the energy transferred from a vibrating bass string to the top plate is through the bridge. The top of the bass in the area of the bridge is partially decoupled from the rib structure by the FF holes, allowing this area to vibrate freely. This is really the primary “hot spot” on the bass, where a lot of energy transfers from vibrating wood into vibrating air. The FF holes have dual functions. Besides allowing the central section of the top to vibrate, they also couple the air space inside the box to that in the room. Low frequency energy is allowed out of the box through the FF holes. This energy, for various reasons, is somewhat difficult to use when micing the bass.
Ok, now let’s look at the Troll on the bass. The ribbon sits two inches or less from the top of the bass, directly adjacent to this big “hot spot” under the bridge. It’s figure 8 polar pattern rejects sources originating 90 degrees off axis to the ribbon (the null donut!), in this case the FF holes and other instruments in the room. Because a ribbon mic is a pressure gradient transducer, proximity effect boosts low frequency response when the mic is used very close to a source. Combining these two elements creates a tradeoff. The problems inherent with micing FF holes are eliminated, and proximity effect makes up for the low end lost by “ignoring” them. The result is a very natural balance between definition and bottom. All this is maintained in careful balance because the mic moves with the bass. This usage exploits the inherent qualities of a ribbon mic effectively, and even uses one of it’s so called “limitations” to our advantage!
How does phantom power damage ribbon microphones?
This seems to be a subject shrouded in mystery and misunderstanding. The following is a careful description of the issue, oriented for those with some technical knowledge, but without a college degree in electrical engineering. (people like me!) Phantom power is 48 volts direct current, applied to both legs of a balanced audio connection. In a transformer coupled ribbon microphone, these legs correspond to the secondary or output coil of the transformer. Since a transformer will not pass DC current in either direction, this 48VDC will not affect the primary (input) coil. However, if for any reason the voltage from either side of the secondary coil is shorted to ground, the result is alternating current, which will pass the transformer, and effect the ribbon. This stretches the ribbon beyond its normal range of motion. The result is not usually a mic that stops working completely, but one that looses its ribbon tension, and therefore its proper frequency response.
Phantom power can reach the ribbon for a number of reasons. The easiest way this can happen is if a connection is made or broken with a TRS type connector, like those used in a patchbay. If this connection is made while +48VDC is present, the connections are made in series, rather than all at once, and thus one side of the balanced connection is momentarily shorted to ground. Another way this can occur is if a cable or connector somewhere in the chain is miswired. There are several practical ways to prevent damage. One is to prevent a ribbon mic from ever being connected to phantom. Then next is to make sure phantom is off before making any connections. Once everything is properly connected (no miswired cables or connectors), one can be sure that the +48 will not escape to ground and cause AC, and phantom power can be added safely. Probably the most effective solution is to use a device like the FEThead, which both adds much needed gain to the signal, and prevents the current from reaching the mic altogether. To summarize, phantom power will not automatically damage a ribbon mic, but by connecting the two, a momentary short of the proper connections will definitely cause damage. The FEThead is a wonderful solution, and is highly recommended if phantom power is unavoidable. By adding this unit, the Troll effectively becomes an active microphone.
How to use the Troll for other instruments:
Using a common spring type microphone clip , the troll can be effectively shock mounted. Simply clamp the mic into the clip with the external windscreen in place, in between the mic body and the clip. The foam buffers vibration between the stand and the mic. Next, use the reusable zip tie to secure the XLR connector to the mic stand. This isolates the mic from cable handling noise. This is obviously low tech, but effective for live use or project recording. Be imaginative, and share the results! It’s highly unlikely that anyone will be injured by experimenting with microphone techniques.